Little Black Dress

Hey everyone!  I hope you had a great holiday weekend!  We are still recovering from the post Christmas frenzy here but I am slowly but surely getting our house back in order.  I wanted to share with you a few projects I created awhile ago using some of my Basic Grey goodies. I used the Little Black Dress collection for these projects.  It's a gorgeous monochromatic collection that is really so elegant yet really versatile.


For this first layout I wanted to scrapbook a sweet photo of my sister in law Fateme and her son Kian.  I asked my sister in law to write some journaling for the layout which I printed directly onto a sheet of patterned paper from the collection.


I punched out lots of different sized hearts and adhered them with dimensional adhesive at the top of my layout.  I added some zig zag stitching down the center of one of the hearts that I had layered with another larger one.  This is one of my favorite things to do and you'll see me do it often on my projects.


The letter stickers in this collection are just fabulous - they have a subtle weave pattern to them and this is by far my favorite Basic Grey font for stickers.


I also created two cards with this collection.  This first card is based on a sketch by the amazing Becky Fleck.  I loved the idea of using various strips of paper to create a pattern on my card front.  The 6x6 Paper Pad is perfect for a project such as this.


For my second card I punched and layered several hearts similar to my layout above.  This time I used a sentiment sticker from the 6x12 Title Stickers as the main focus of my card.


Supplies (click images for links):

A very Bella birthday!


Today is a very special person's birthday - the amazing owner and creative mind behind one of my favorite scrapbook company's ... Stephanie Hunt!  The Bella design team decided to surprise Stephanie with a very Bella birthday blog hop.  For those of you that are just joining me, you will want to be sure to start your hopping here at the Bella blog. 


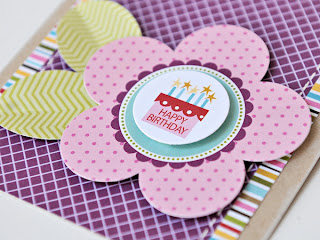
I created my card using a combination of new and old Bella products.  I just LOVE that it is so easy to mix and match products between different collections and releases.  It really helps to make sure I use those products that are in my stash while still letting me play with some brand spankin' new goodies.


Stephanie - I hope you have the happiest of birthdays and that all of your birthday wishes come true.  I am so very lucky to design for your amazing company and wish you all of the best this next year.

Even thought it's Stephanie's birthday, we have some gifts for a few of you lucky readers as well! We know how generous and giving Stephanie is, and we know she would never have a fun blog hop, without a few giveaways up for grabs too. So we got permission from Robin, who works alongside Stephanie in the office, to pick TEN lucky winners, who will each receive a Bella Blvd collection. All you need to do to be entered in the random drawings, is to leave Stephanie your birthday wishes on this blog post. You have lots of opportunities to up your chances, since you can leave a comment on each blog you visit, as you go through the blog hop. There are 26 blogs, plus the Bella Blvd blog, for a total of 27 chances to get your name in the pot. We will randomly select winners, from 10 randomly chosen blogs, and announce them on Friday! 

For the next stop on the blog hop please visit the super creative Julie Johnson here.  Thanks for stopping by!  :)

Bella Blvd Layout

Hey everyone!  I have another layout to share today.  This one is using the adorable Christmas Wishes collection from Bella Blvd.  This is such a fun holiday collection - I love the bright colors and fun, whimsical designs in this line.  I created this layout as part of an inspiration challenge over on the Bella Blvd blog.  To see the inspiration image and what some of the other Bella Blvd designers created stop by the Bella Blvd blog


I decided to change my photos to black and white so they would not compete with the bright colors of the papers and embellishments.  The inspiration image had lots of banners so I decided to create a border of banners on my layout.  Creating these banners are so easy - just a few snips of my scissors and voila!  I arranged some chipboard pieces along the bottom of my layout and printed out and cut my journaling into strips.


Supplies (click images for links):

RC CAR love

Hey everyone!  I wanted to share a layout that went up in the Garden over at Two Peas In A Bucket yesterday.  This layout uses the amazing new boy themed collection Chap from American Crafts

This layout is copyright Two Peas in a Bucket

As soon as I saw these papers I knew they would be perfect for these photos I snapped of Darian this summer playing with his RC car.  Darian had wanted an RC car for his birthday after seeing our neighbors playing with theirs every day.  I was so happy when these papers appeared in the shop at Two Peas and snatched up the entire collection.


I used a combination of American Crafts Thickers and Silhouette die cut for my a title.  I placed my title on the white space in the foreground of my main photo.  This is a great way to tie elements of your layout together.

And here are a few more detail images ...


Supplies (click images for links):